Building a JavaScript library - part 1: testing
In the Building a Knockout paging plugin post, we developed a Knockout paging plugin. This is the first in a series of posts that discuss the steps taken to publish our library. In this post, we’ll look at testing our library.
Why testing?
Before we dive into testing, let’s consider why we write tests at all. Tim King did a great job on listing twelve benefits of writing tests:
- Unit tests prove that your code actually works.
- You get a low-level regression-test suite.
- You can improve the design without breaking it.
- It’s more fun to code with them than without.
- They demonstrate concrete progress.
- Unit tests are a form of sample code.
- It forces you to plan before you code.
- It reduces the cost of bugs.
- It’s even better than code inspections.
- It virtually eliminates coder’s block.
- Unit tests make better designs.
- It’s faster than writing code without tests.
There is even scientific data that shows the value of writing tests. For our library, we’ll write tests to ensure our software works as intended and to prevent new releases from breaking existing features.
Test framework
Before we can start writing tests, we need to choose a test framework. The three most popular JavaScript test frameworks are probably:
We prefer Mocha, for its ease of use and great asynchronous testing support. One thing to note about Mocha is that you need to plug in an assertion library. Once again, there are many options, but we chose chai for its flexibility. Another strong point of both Mocha and Chai is that they have great documentation.
Having chosen our test framework and assertion library, we install them using NPM:
npm install mocha --save-dev
npm install chai --save-dev
Choosing a test format
Before we’ll start to write our tests, we have to decide in what format to write our tests. Mocha supports various formats, but most people use either the TDD or BDD style. When done properly, BDD tests describe how your system should behave, like a requirements document. Furthermore, BDD tests are written in a format such that non-programmers should also be able to understand them. For these reasons, we choose to write our tests in BDD style.
Writing tests
Having chosen our test format, we can start writing our tests. As BDD tests form a type of specification, we name the file that will contain our tests spec.js. In that file, we first specify the test format (BDD) and create a shortcut for Chai’s expect function. The latter is done to improve the readability of our tests.
mocha.setup("bdd");
var expect = chai.expect;
Now we’ll write our first test using the describe() and it() functions:
describe("paged extender", function () {
  it("pageCount on empty paged observable array is 1", function () {
    var emptyPagedArray = ko.pagedObservableArray();
    expect(emptyPagedArray.pageCount()).to.equal(1);
  });
});
The describe() function is used to group related tests, the it() function contains the actual test. As you can see, we use a verbose test name, as BDD prescribes. Don’t be hesitant to use verbose test names, they will make your test results much easier to read.
The line in which we test if pageCount() returns the correct value, almost reads like a sentence. Once again, this is typical for the BDD style.
Running tests
Mocha tests run in an HTML file, known as a test runner. Hence, we create a runner.html file:
<!DOCTYPE html>
<html lang="en">
  <head>
    <meta charset="utf-8" />
    <title>Knockout paged spec</title>
    <link rel="stylesheet" href="node_modules/mocha/mocha.css" />
  </head>
  <body>
    <!-- 1. Placeholder node that will contain the test results -->
    <div id="mocha"></div>

    <!-- 2. Library dependencies -->
    <script src="node_modules/knockout/build/output/knockout-latest.debug.js"></script>

    <!-- 3. Library -->
    <script src="index.js"></script>

    <!-- 4. Test libraries -->
    <script src="node_modules/chai/chai.js"></script>
    <script src="node_modules/mocha/mocha.js"></script>

    <!-- 5. Tests -->
    <script src="spec.js"></script>

    <!-- 6. Run tests -->
    <script type="text/javascript">
      mocha.run();
    </script>
  </body>
</html>
The test runner is comprised of the following parts:
- The
<div>HTML element to which Mocha will write the test results. - Script include of our library’s only dependency: Knockout.
- Script include of the library itself.
- Script includes of the Mocha and Chai test libraries.
- Script include of the specification file containing the tests.
- JavaScript code to get Mocha to run our tests.
If we open this test runner file in a browser, you’ll see something like this:
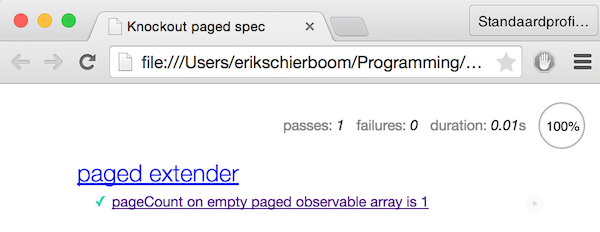
As you can see, Mocha has run one test, which passed. Note that Mocha used the describe() function to group tests.
Structuring tests
Once you add more tests, how you structure your tests becomes important. Two simple options to structure your tests are:
- Put related tests in separate files.
- Put related tests in a (nested)
describe()block.
As we have a relative small amount of tests, we’ll use the describe() option:
describe("paged extender", function () {
  describe("on empty paged observable array", function () {
    it("itemCount is 0", function () {
      var emptyPagedArray = ko.pagedObservableArray();
      expect(emptyPagedArray.itemCount()).to.equal(0);
    });
  });

  describe("on single-item paged observable array", function () {
    it("itemCount is equal to 1", function () {
      var singleItemPagedArray = ko.pagedObservableArray(["a"]);
      expect(singleItemPagedArray.itemCount()).to.equal(1);
    });
  });
});
The output now looks like this:
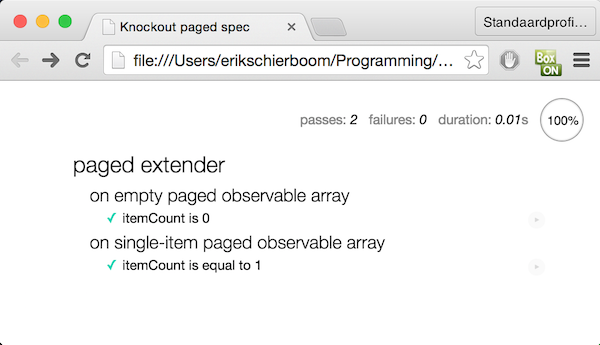
You can clearly see how the nesting also influences the output. Note that we modified the test names to better combine with the nested context’s description.
As nested describe() calls can become a bit confusing, Mocha also supports the context() function to group tests:
describe("paged extender", function () {
  context("on empty paged observable array", function () {
    it("itemCount is 0", function () {
      var emptyPagedArray = ko.pagedObservableArray();
      expect(emptyPagedArray.itemCount()).to.equal(0);
    });
  });

  context("on single-item paged observable array", function () {
    it("itemCount is equal to 1", function () {
      var singleItemPagedArray = ko.pagedObservableArray(["a"]);
      expect(singleItemPagedArray.itemCount()).to.equal(1);
    });
  });
});
The output of this code is exactly the same as the previous example, which makes sense as context() is just an alias for describe().
Context-dependent test setup
When tests are grouped, they are usually related to each other. Normally, this implies that they share at least part of their test setup code. As an example, consider the following tests, which all test a property of an empty paged array:
context("on empty paged array", function () {
  it("itemCount is 0", function () {
    var emptyPagedArray = ko.pagedObservableArray([]);
    assert.strictEqual(emptyPagedArray.itemCount(), 0);
  });

  it("pageCount is 1", function () {
    var emptyPagedArray = ko.pagedObservableArray([]);
    assert.strictEqual(emptyPagedArray.pageCount(), 1);
  });

  it("hasPreviousPage is false", function () {
    var emptyPagedArray = ko.pagedObservableArray([]);
    assert.isFalse(emptyPagedArray.hasPreviousPage());
  });
});
Each test contains the exact same line to setup the empty paged array. To share this common setup code, we can move it into a beforeEach() function:
context("on empty paged array", function () {
  var emptyPagedArray;

  beforeEach(function () {
    emptyPagedArray = ko.pagedObservableArray([]);
  });

  it("itemCount is 0", function () {
    assert.strictEqual(emptyPagedArray.itemCount(), 0);
  });

  it("pageCount is 1", function () {
    assert.strictEqual(emptyPagedArray.pageCount(), 1);
  });

  it("hasPreviousPage is false", function () {
    assert.isFalse(emptyPagedArray.hasPreviousPage());
  });
});
What happens is that just before Mocha runs a test, it checks for a beforeEach() function in the context() or describe() call the test is defined in. If a beforeEach() function is found, Mocha calls it just before running the test.
Conclusion
To test our library, we wrote our tests using Mocha and Chai, which were both easy to use and well documented. Our tests were written in BDD style, which we feel makes them easier to read and can help people understand how the library should work.
Although hard to quantify, we feel the tests helped us reduce the number of bugs in our code. Furthermore, they protected us from breaking things when we released new versions of the library.
In the next post, we’ll look at how we automated repetitive tasks.