Building a JavaScript library - part 5: build server
This is the fifth in a series of posts that discuss the steps taken to publish our library. In our previous post, we added support for package managers. This post will show how we use build servers to automatically build and test our software.
Build servers
When creating a library, it is important to verify that your code also works as intended on other machines/configurations. One way to do this is by utilising a build server, which is software designed to automatically build (and often test) software.
Most build servers can be linked to a source control repository, which allows them to do automatic builds whenever a change in the source control repository is detected. This automatic building is known as continous integration.
For our library, we’ll look at two online build servers: Travis and AppVeyor. We’ll use both to do continuous integration of our library. Note that for open-source software (like our library), both Travis and AppVeyor are free of charge.
Travis
The first build server, Travis, is probably the most popular online build server. It supports a wide variety of build environments, which allows it to build software for many platforms and languages. Note that each build environment runs on Linux.
To work with Travis, the first step is to create an account. Registering is easy, as you can just use your existing GitHub account. Once registered, you’ll be redirected to your account’s page:
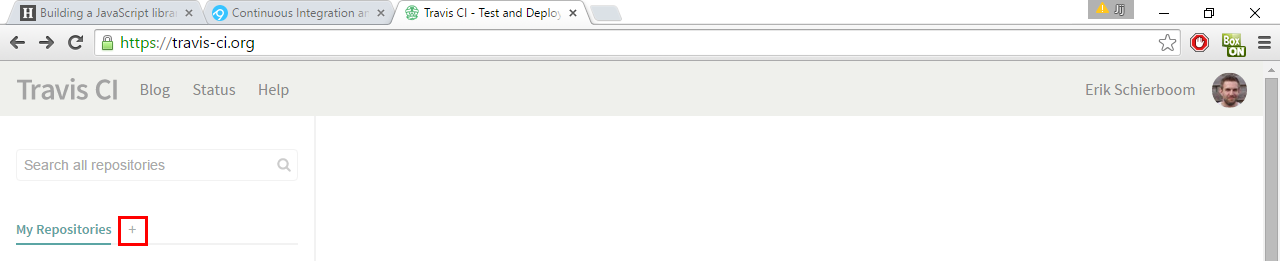
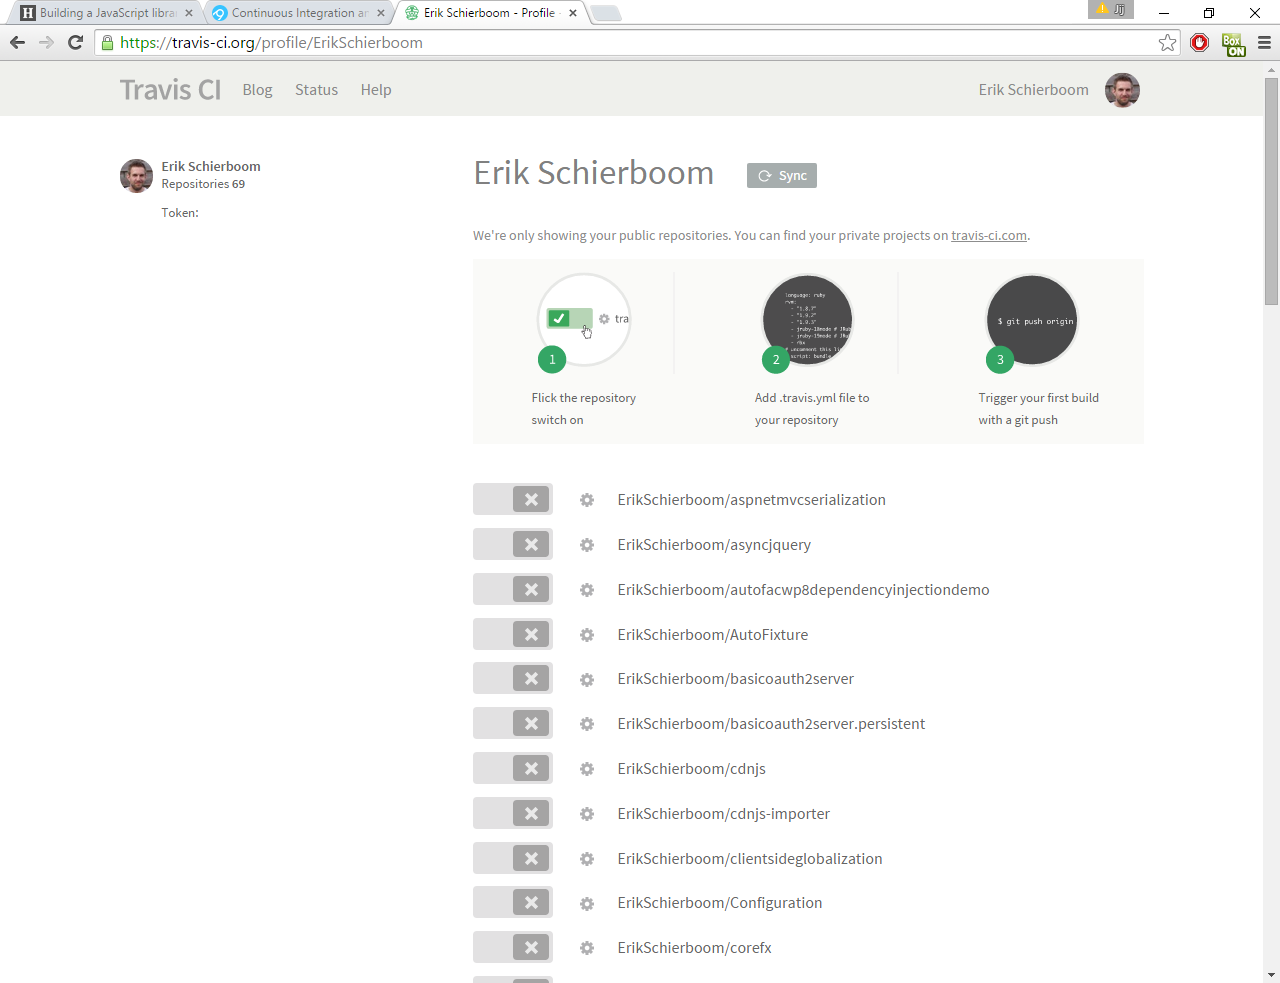
Here, we click on the “+” next to “My Repositories” (highlighted in red). This will redirect us to a page that lists all your public GitHub repositories:
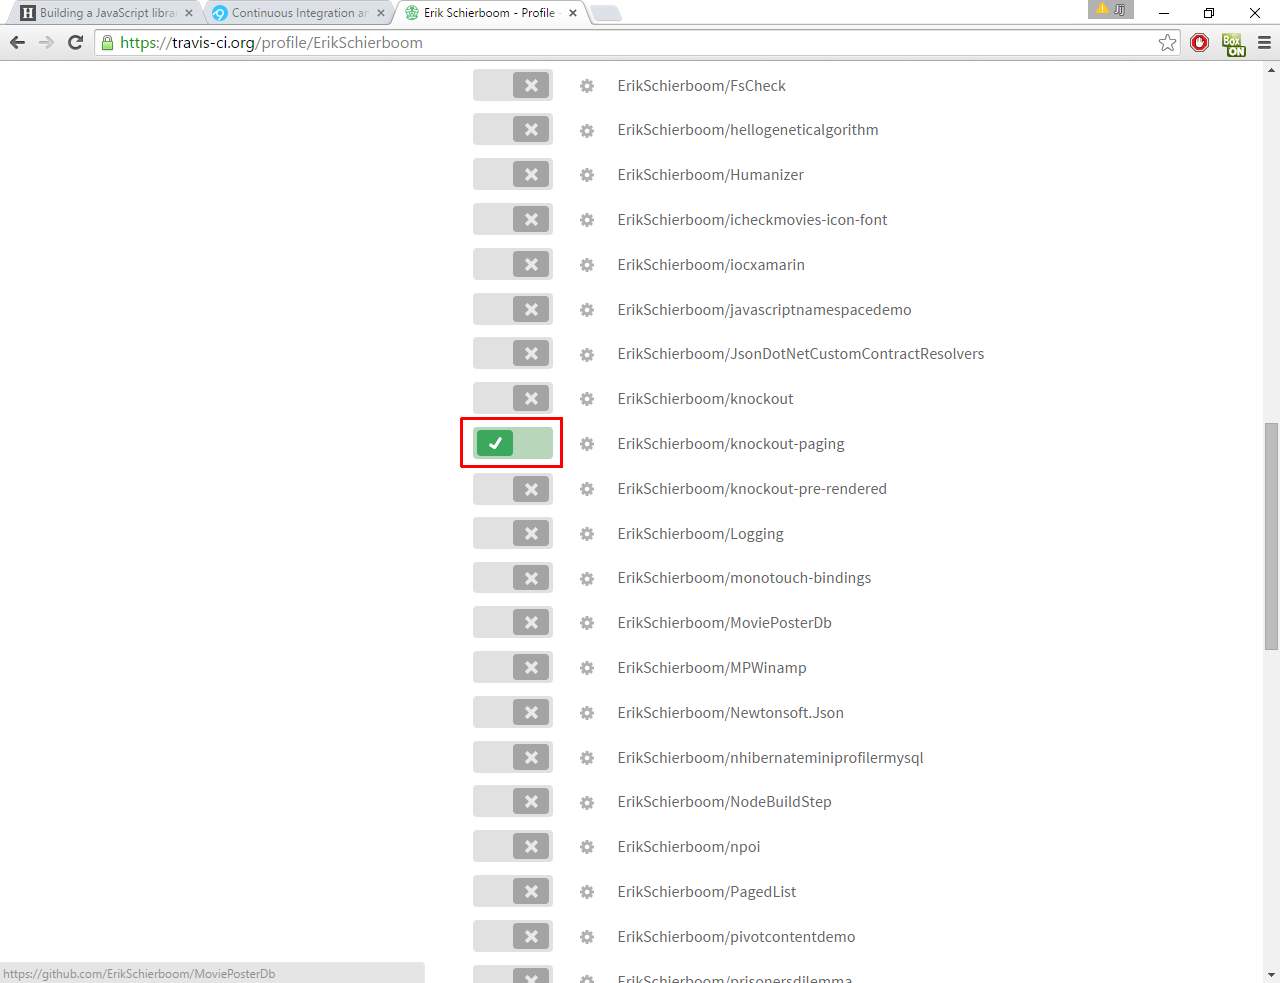
To enable Travis builds for our library’s repository, we find it in the list and click on the button with the cross before the repository’s name. After some brief processing, the button will become green and Travis builds will have been enabled for that repository:
Next, we click on the cogwheel icon adjacent to the enable button. This will show our project’s settings page:
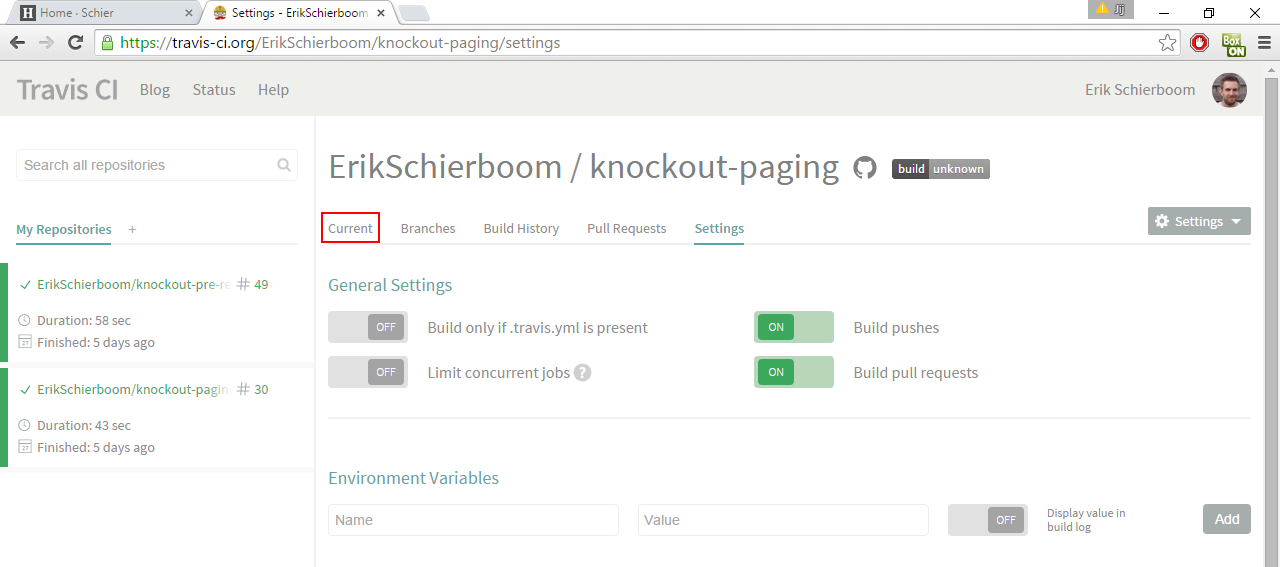
We’ll ignore the various settings and open the “Current” tab:
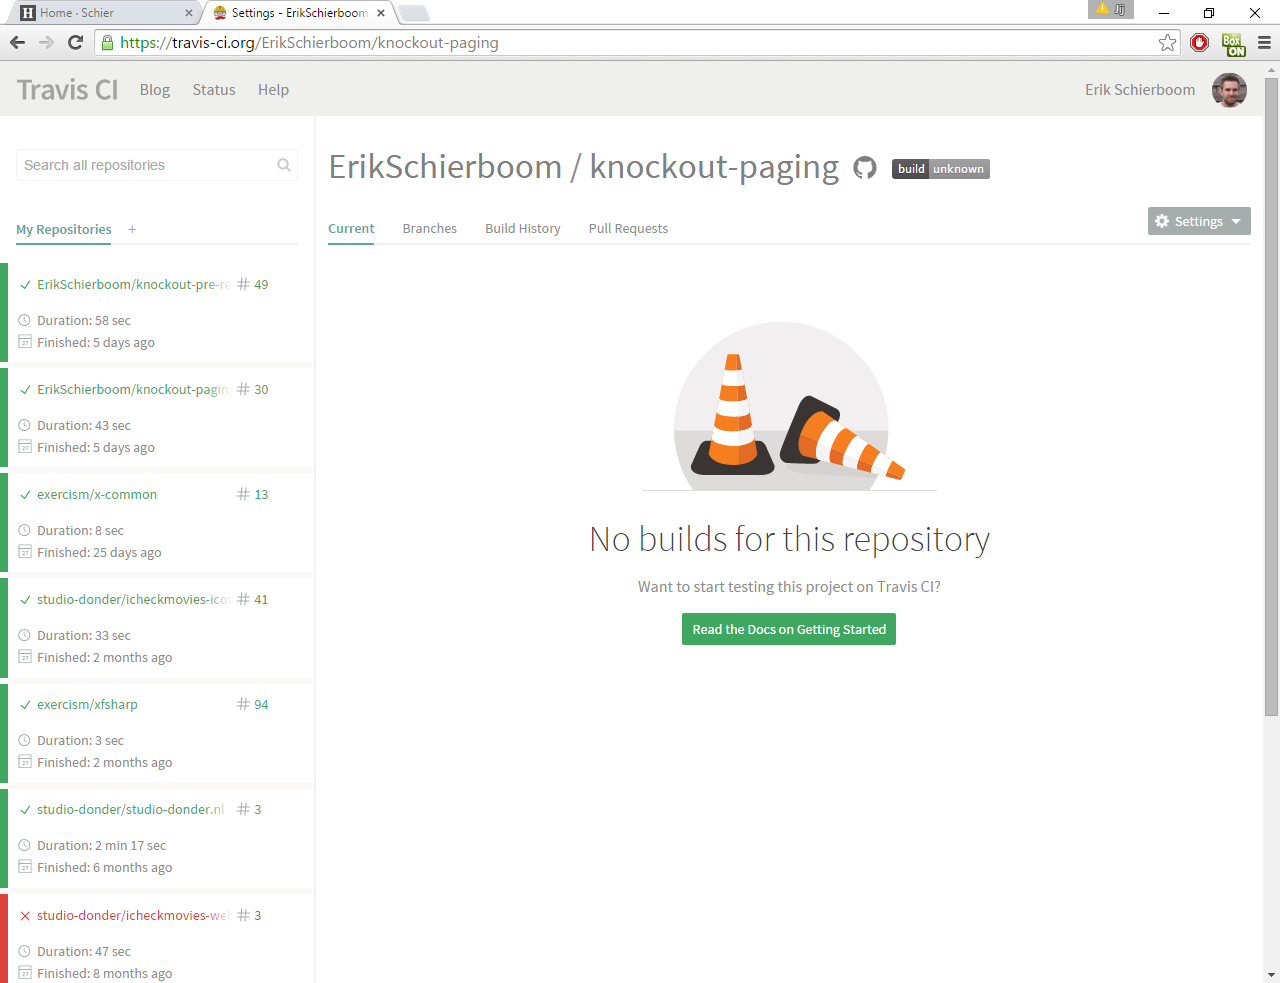
At the moment, there are no builds for this repository. To allow Travis to build our repository, we need to create a YAML configuration file named .travis.yml in our repository’s root folder. The full list of configuration options is huge, but our project only needs a fairly minimal configuration file:
language: node_js

before_install:
  - npm install -g gulp

script: gulp ci
The first line specifies the language Travis should create a build environment for. As our library uses Node.js for building and testing, we’ll use that as our platform/language.
In the second line, we indicate that before running our actual build script, we want Travis to install Gulp in our build environment. Note that we can use NPM here, which Travis installs automatically for Node.js build environments.
Finally, we tell Travis what script to run to build our repository. For that, we use our custom gulp ci command, which uses Gulp (installed in the previous step) to build and test our library.
We then commit the .travis.yml file to version control and push it to GitHub. At this point, Travis will automatically detect the change in our repository and adds it to the build queue. After a short while, Travis will be running the build as specified by the .travis.yml file and output the build log to the screen:
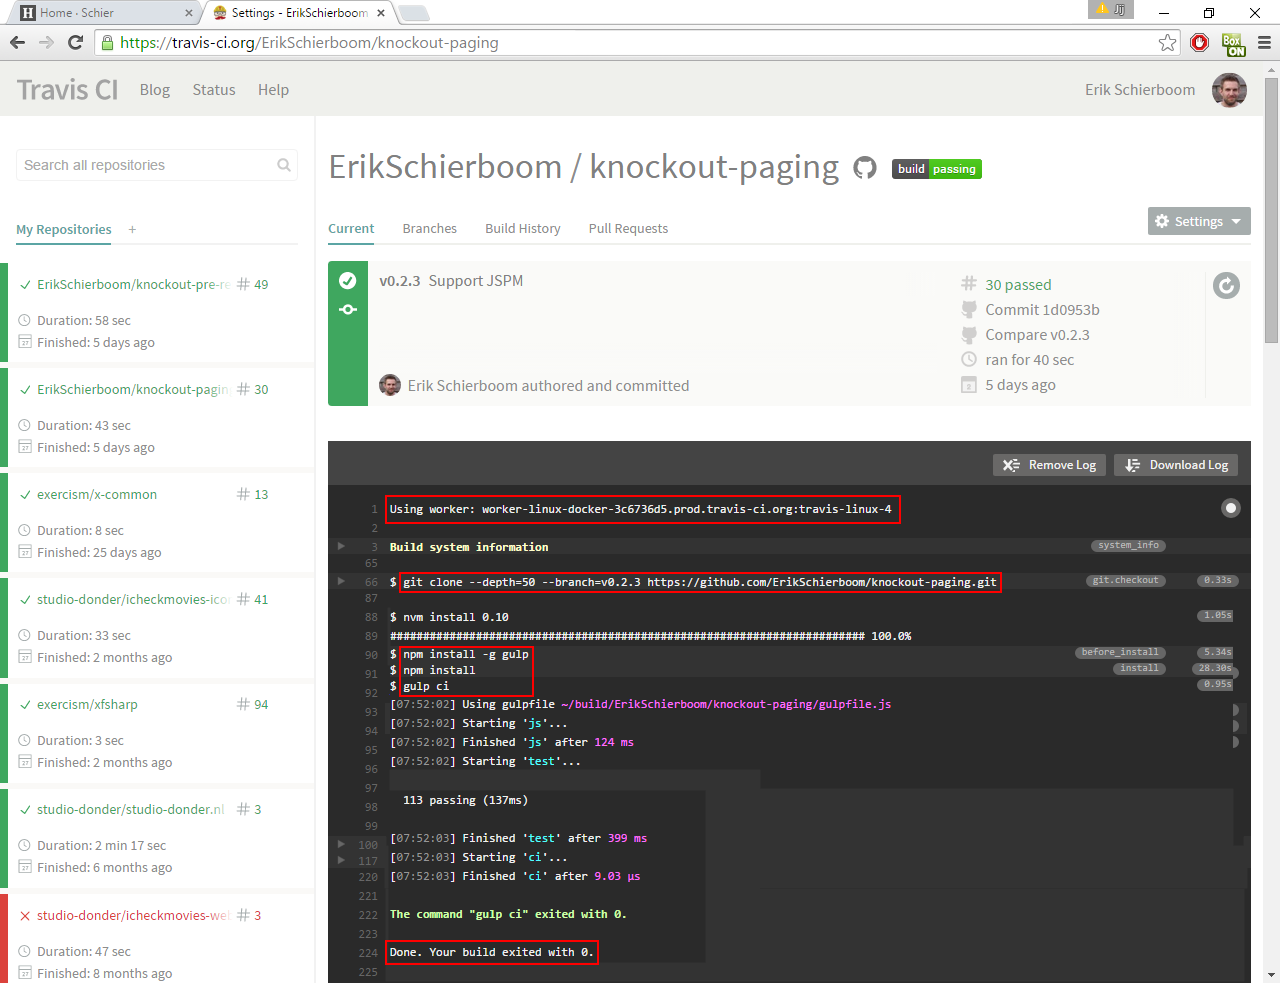
This build log shows that Travis does several things:
- Create a worker environment.
- Use Git to clone our repository.
- Install Node.js.
- Run the
before_installscript, which installs Gulp. - Run
npm installto install any package dependencies. - Run the
scriptscript, which executes thegulp cicommand. - Determine if the build’s success by looking at the exit code (0 means success).
From now on, each change in our repository will trigger a new Travis build. This means that we use Travis for continous integration.
It is worth noting that you’ll receive an email with the build results each time Travis has run a build.
Badge
One last thing we can now do is to include a badge in our project’s readme. This badge is an image showing the last build’s status.
To find the badge settings, click on the build status button next to the GitHub logo:
![]()
The badge is available in many different output formats, including the Markdown format used in our readme file:
[](https://travis-ci.org/
ErikSchierboom/knockout-pre-rendered)
After commiting the updated readme file to the repository, our project’s readme now includes the latest Travis build status:
![]()
AppVeyor
The second build server we’ll look at is AppVeyor, which is a build server that runs on Windows (whereas Travis runs on Linux).
Registering is simple, as you can either create a new account or use your existing GitHub, BitBucket or Visual Studio Online account.
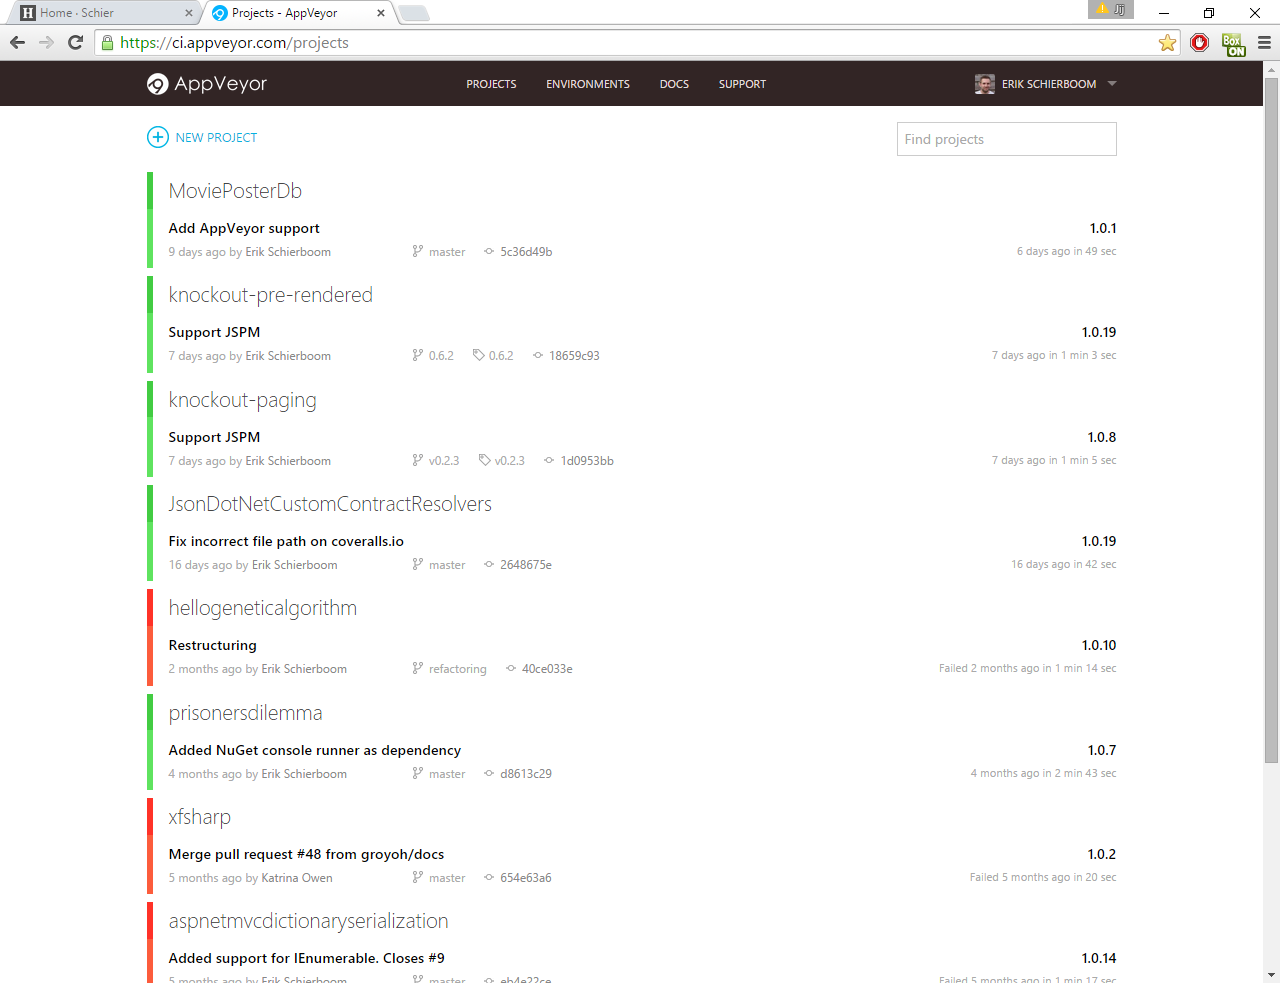
Once registered, you are redirected to a page with an overview of your existing projects:
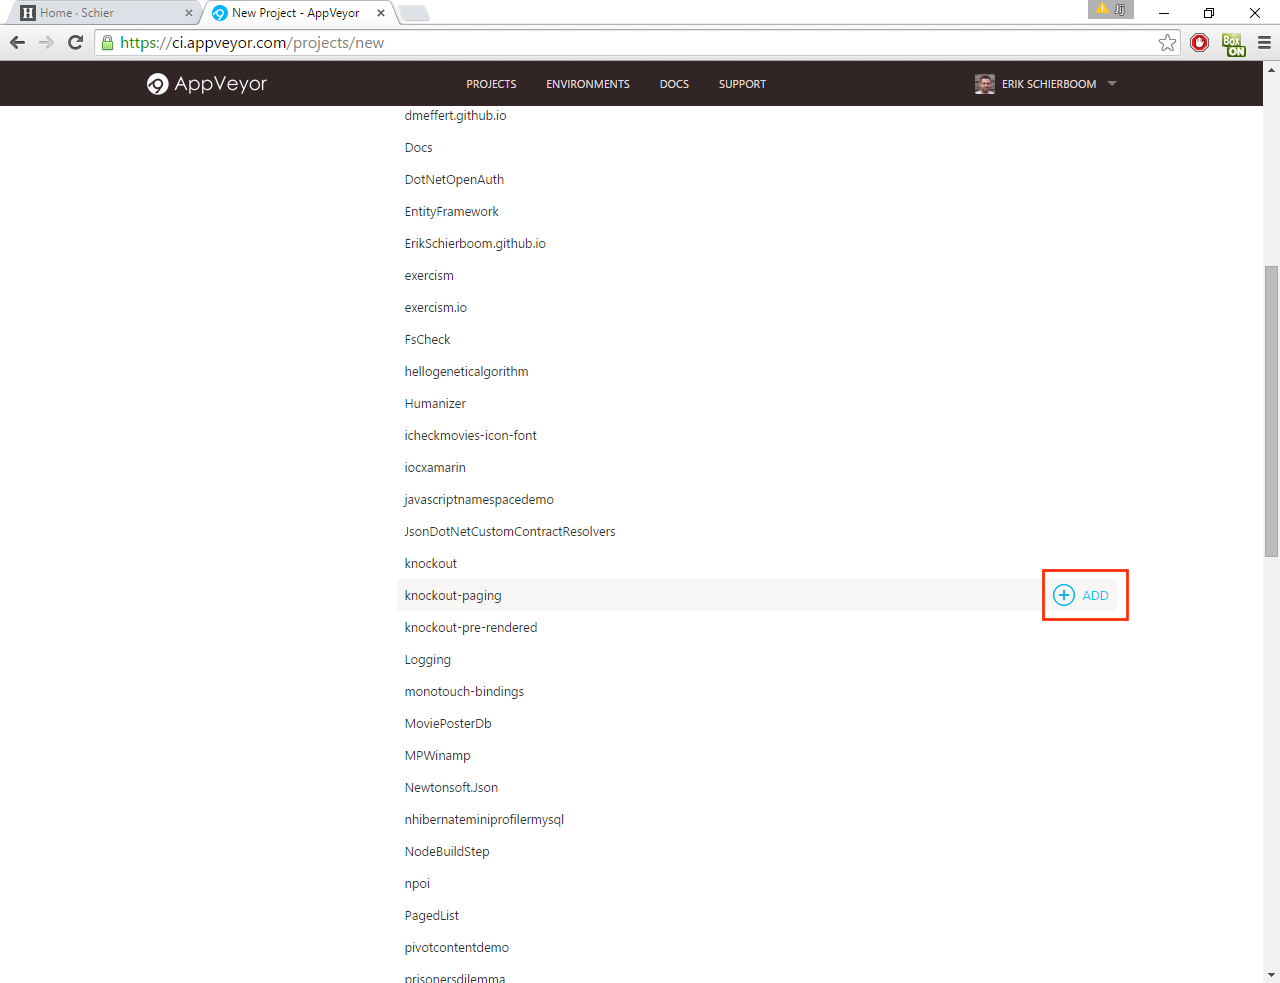
Here, we click on the “NEW PROJECT” button, which redirects us to a page where all our projects are listed:
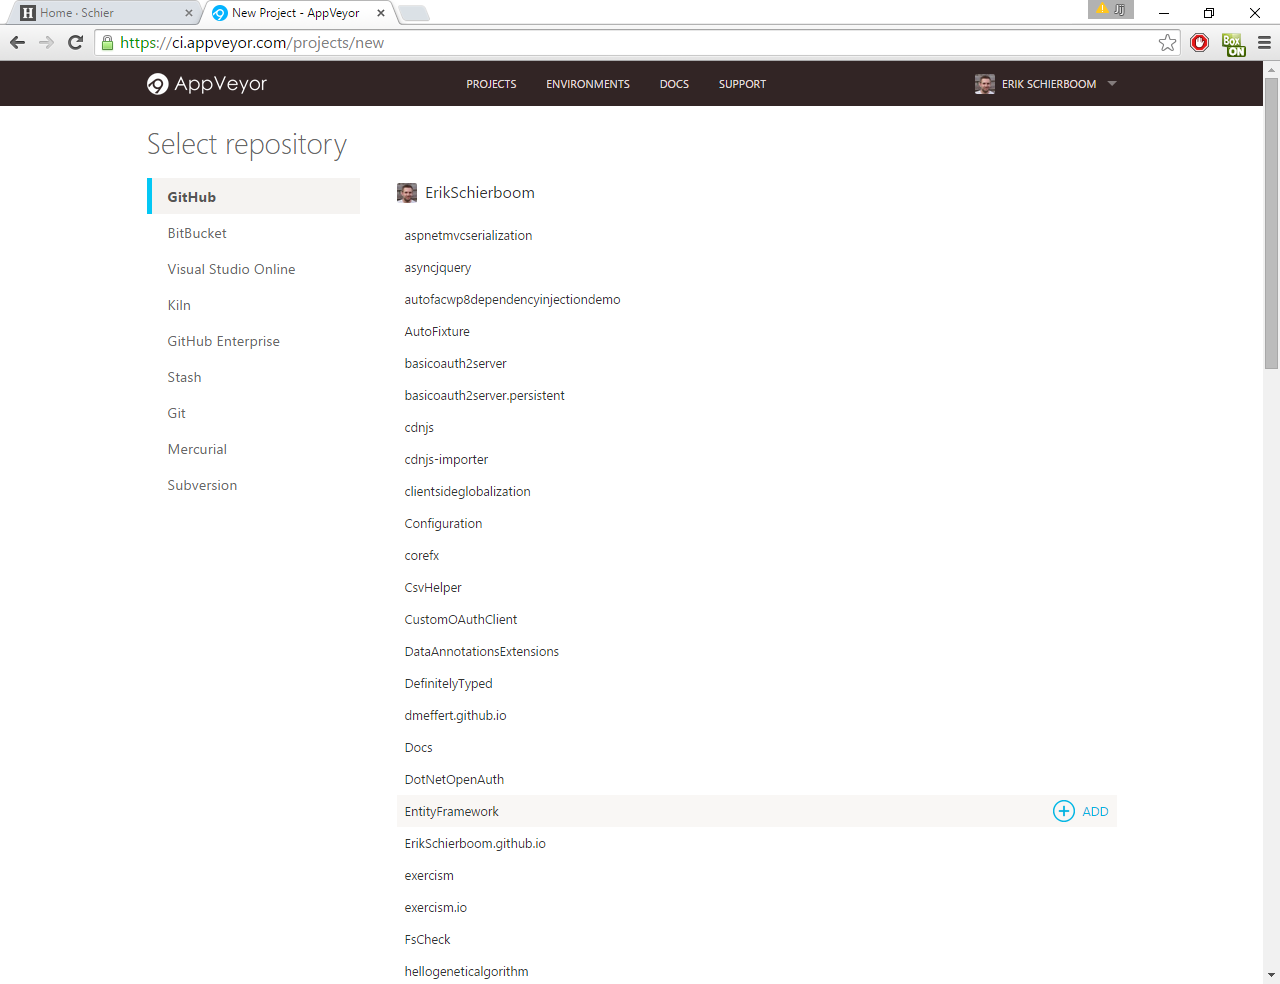
Having selected GitHub as our project source, we then hover over our target project and click on the “ADD” button:
After some processing, our project’s own build page is shown:
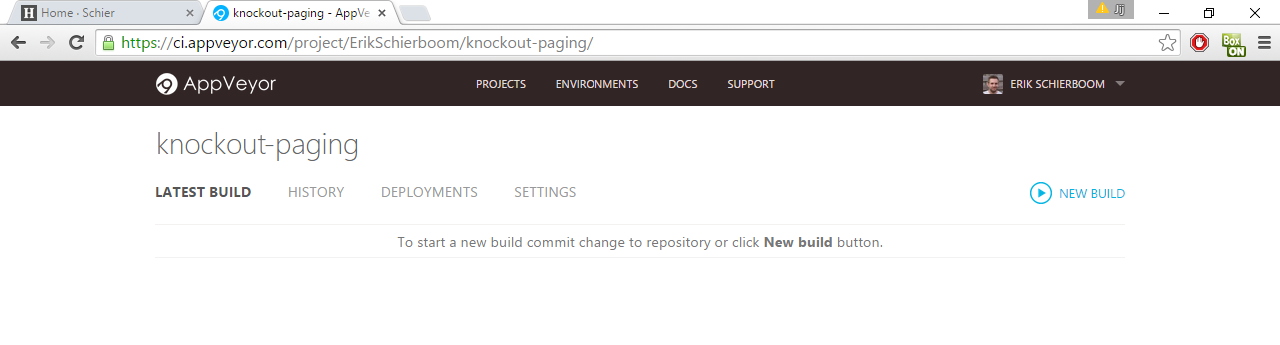
By default, it shows the latest build, which we don’t yet have. To build our project, we once again create a YAML configuration file in our project’s root, this time named appveyor.yml:
environment:
  nodejs_version: "0.12"

install:
  - ps: Install-Product node $env:nodejs_version
  - npm install
  - npm install -g gulp

test_script:
  - gulp ci

build: off
This build file will cause AppVeyor to do the following things:
- Create a worker environment.
- Use Git to clone our repository.
- Install Node.js.
- Run
npm installto install any package dependencies. - Install Gulp.
- Run the
gulp ciscript. - Determine the build’s success by looking at the exit code.
Note that we set the build configuration option to off, as we want to disable AppVeyor’s automatic build command feature, as that only works for .NET repositories.
We then commit the appveyor.yml file to our repository and push it to GitHub. AppVeyor will detect this change to our repository and add it to its build queue. After a short while, the build will be run and its output is written to the screen:
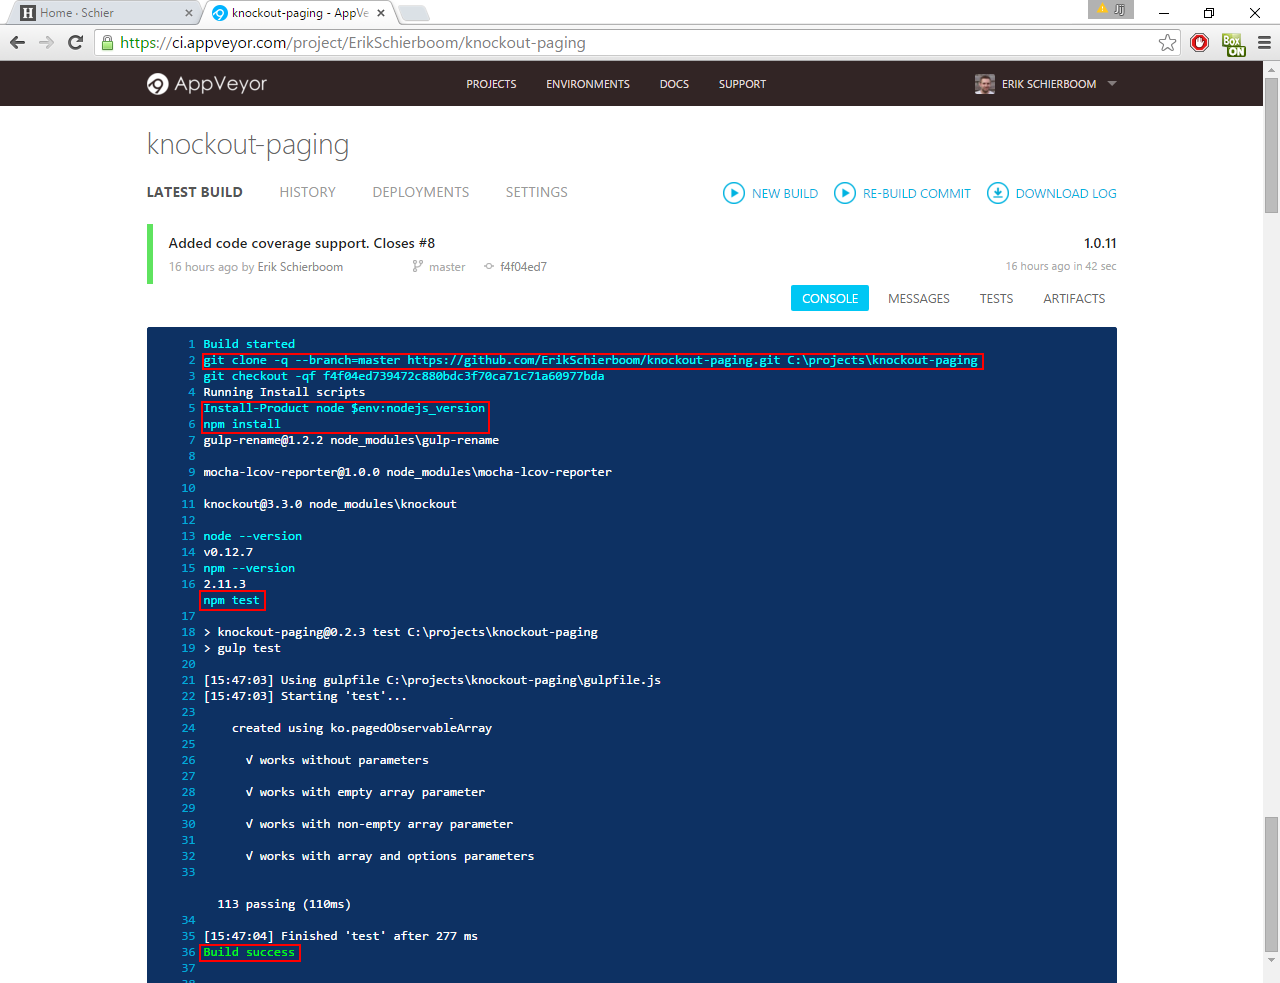
Once again, you can clearly see that the steps that were executed reflect our YAML configuration file.
Badge
AppVeyor also supports badges, which you can find in the “Badges” section on the project’s “SETTINGS” tab:
![]()
Once again, we’ll select the Markdown format and add it to our readme file:
[](https://ci.appveyor.com/project/ErikSchierboom/knockout-paging)
Having pushed our modified readme to the repository, it now also shows the AppVeyor badge:
![]()
Code coverage
As our build servers also run our library’s tests, we can do one last cool thing: generate code coverage reports and automatically upload them to coveralls.io.
First, you need to create an account at coveralls.io. You can use your GitHub or Bitbucket credentials to sign up. After authentication finishes, you’ll be redirected to your projects page:
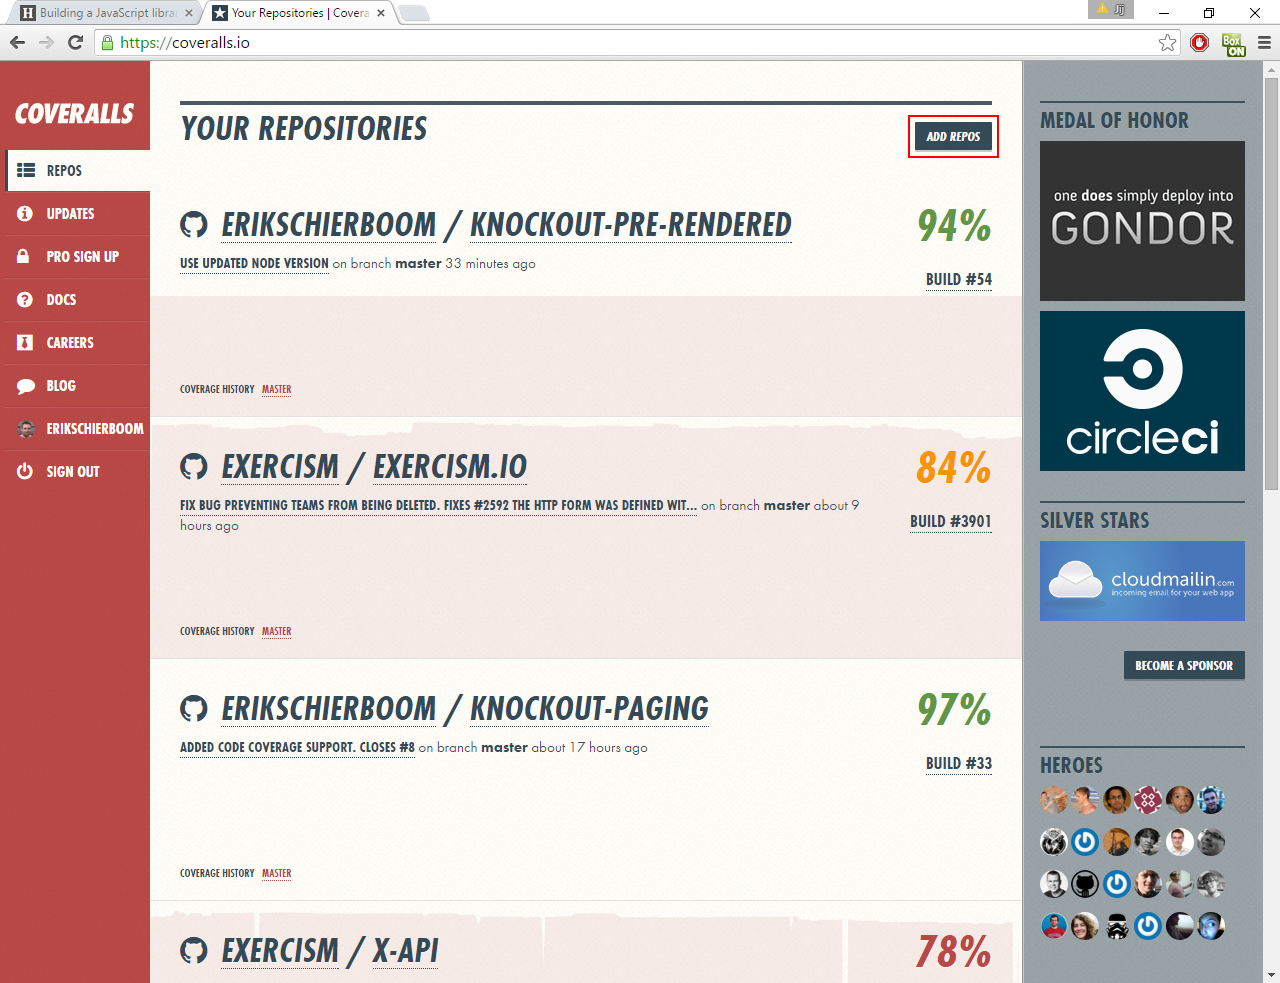
We now need to select the repository for which we want to store coverage. We do that by clicking on the “ADD REPOS” button. We will then be shown an overview of all our repositories:
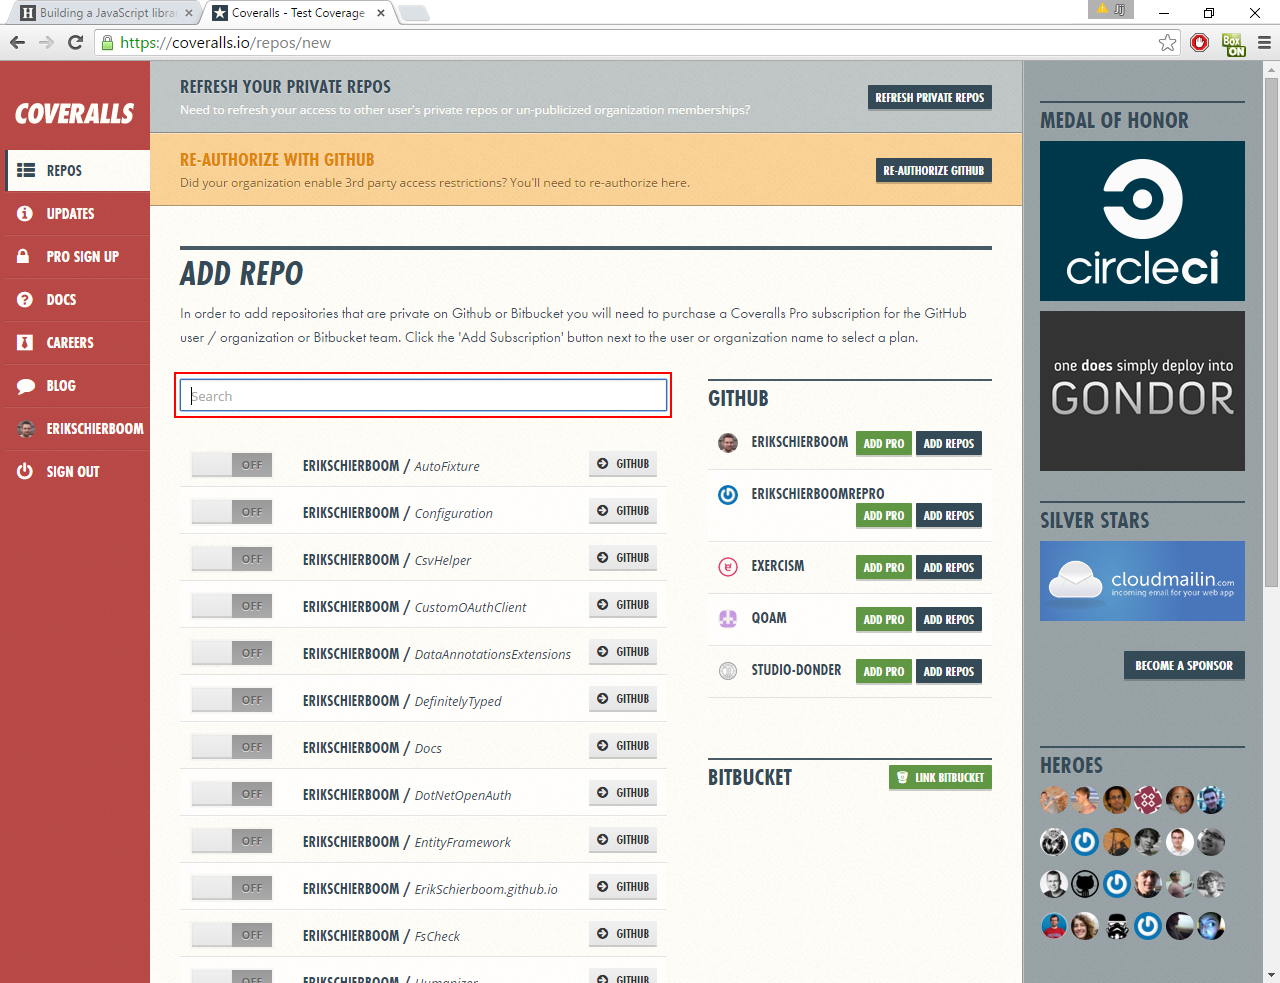
Using the search box, we search for our repository:
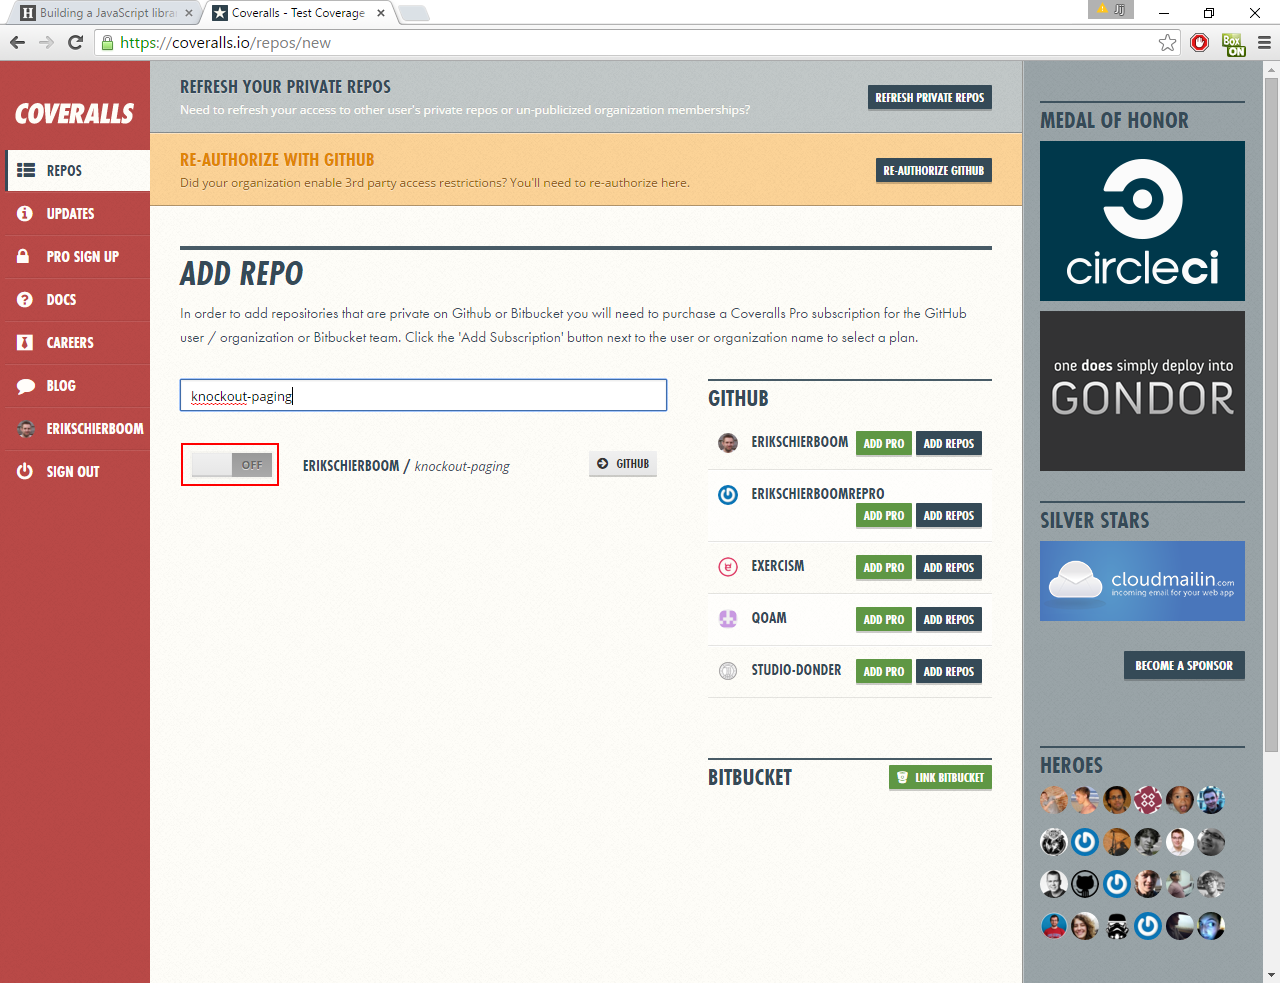
We then click on the “OFF” button, which will enable coverage data to be stored for that repository.
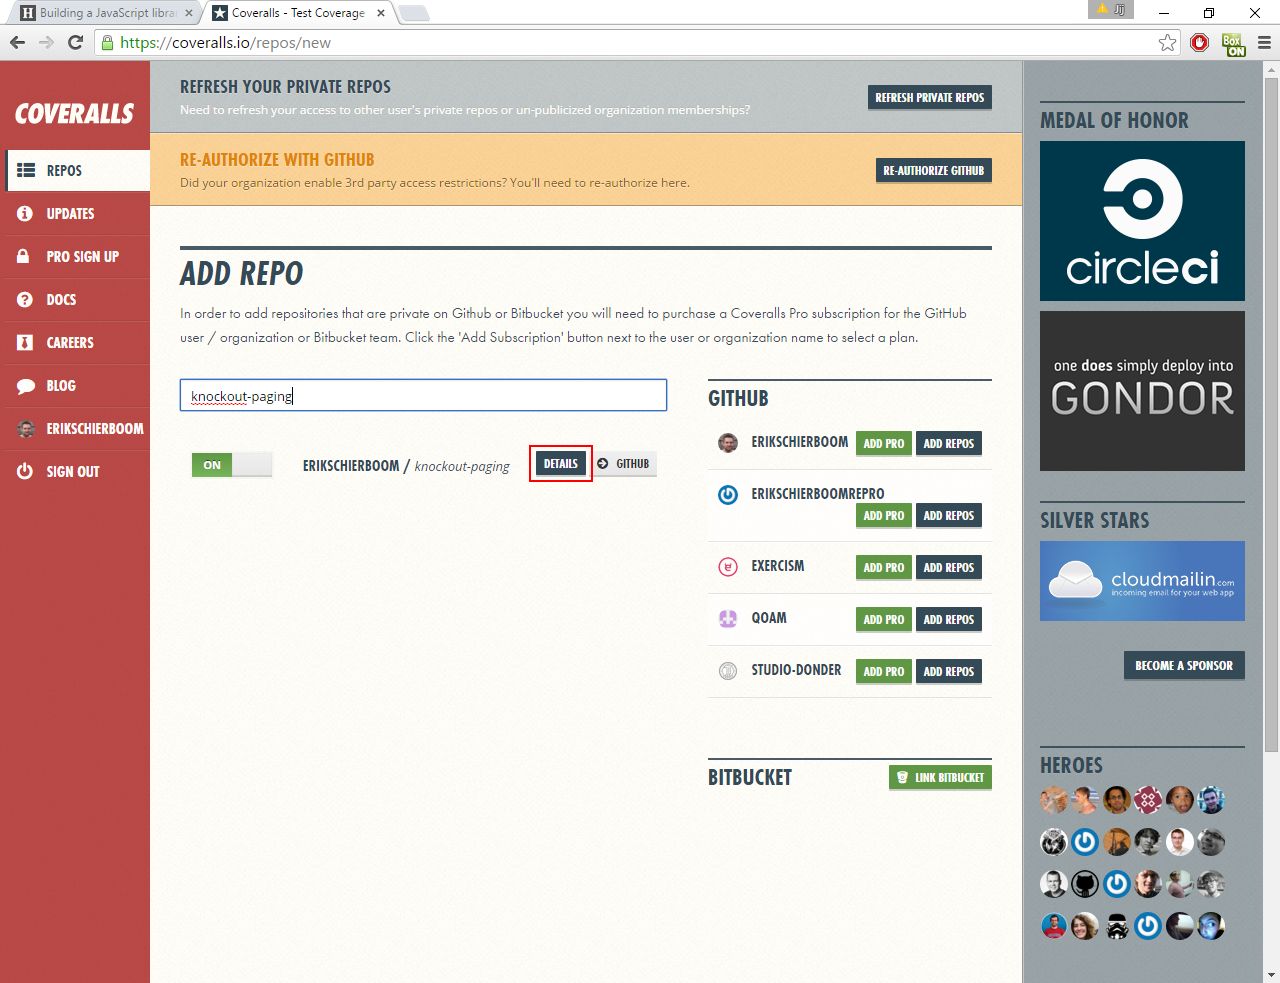
When coverage has been enabled, the button becomes green and its text will change to “ON”. An additional button named “DETAILS” will also have appeared. Click on that button. This will show our repository’s page:
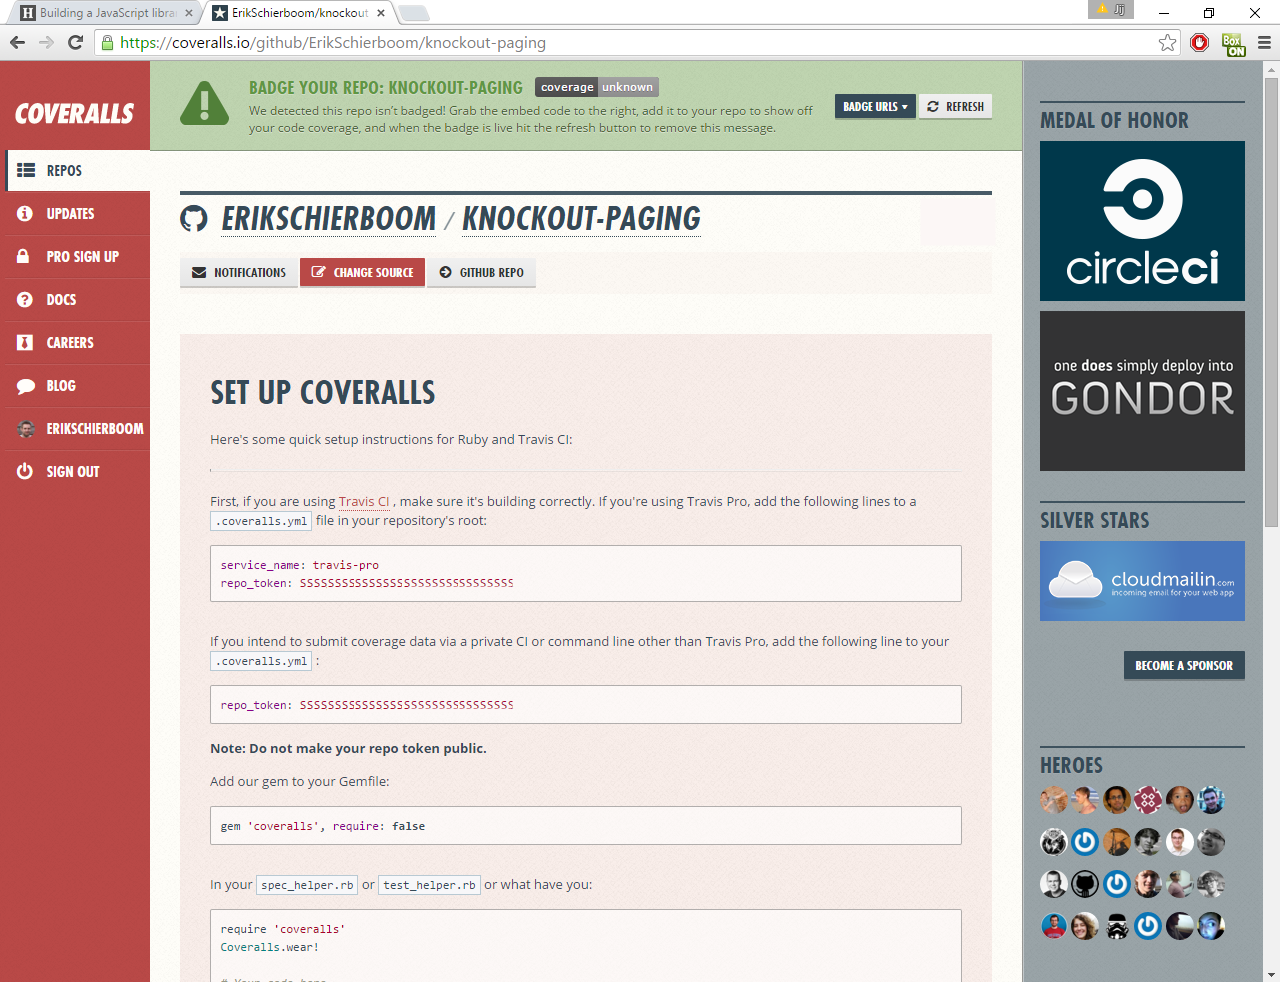
As we don’t have any coverage at the moment, instructions are displayed on how to get started. The first step is to have our library generate code coverage reports.
Generating code coverage reports
Because code coverage is determined by running tests, we need to hook up a code coverage tool to our library’s test runner: Mocha. One of the best code coverage libraries is blanket.js, which supports QUnit, Jasmine and Mocha. Let’s install Blanket:
npm install blanket --save-dev
To have Blanket correctly calculate code coverage, we need to add a "config" section to the package.json file. For our library, this "config" section looks like this:
"config": {
  "blanket": {
    "pattern": [
      "index.js"
    ],
    "data-cover-never": [
      "node_modules"
    ]
  }
}
The most important part is the "pattern" key, which contains the filenames Blanket should be generating code coverage for. As our library is contained in a single index.js file, we only list that file. The "data-cover-never" key specifies the files or directories to ignore. We set it to "node_modules" to prevent any package dependencies from accidentally being analyzed.
Believe it or not, but we are now ready to generate code coverage reports! Generating the actual coverage report is done through Mocha, which is a dependency of our library and thus already installed. To create a coverage report using Mocha, we add an entry to the "scripts" section in our package.json file:
"scripts": {
  "coverage": "mocha --require blanket -R html-cov > coverage.html"
}
This new "coverage" command runs Mocha, including the blanket code coverage library. The "-R" option specifies the type of report we want to output, which in our case is an HTML report that will be written to coverage.html.
We can now create the report by executing:
npm run coverage
This will create the coverage.html file, which you can view in a browser:
This report lists the code coverage percentage and highlights uncovered lines in red.
Unfortunately, this HTML coverage report cannot be used as input for coveralls.io, which requires code coverage reports in a JSON-based format:
{
  "name": "example.rb",
  "source_digest": "asdfasdf1234asfasdf2345",
  "coverage": [null, 1, null]
}
To have our library submit code coverage reports to coveralls.io in the correct format, we first install the mocha-lcov-reporter library:
npm install mocha-lcov-reporter --save-dev
This library adds a reporter to Mocha that outputs coverage data in a more structured format.
Let’s add another entry to the "scripts" section in our package.json file that uses this new reporter:
"scripts": {
  "coverage-lines": "mocha --require blanket -R mocha-lcov-reporter > coverage.lcov"
}
If we run this command, the resulting coverage.lcov file looks something like this:
SF:D:Programmerenknockout-pagingindex.js
DA:9,1
DA:10,1
DA:11,0
DA:12,1
DA:13,1
DA:15,0
DA:22,1
DA:25,1
This file bears some resemblance to coveralls.io’s JSON format, but it is not quite the same. To convert this file to the coveralls.io format, we’ll need the coveralls package:
npm install coveralls --save-dev
This library can convert mocha-lcov-reporter coverage files to the coveralls.io format, which it then submits to coveralls.io.
Before we can use this library to submit our coverage results, we have to let the coveralls library know which coveralls.io repository it should send the coverage to. For this, you have to use the repository’s unique token, which can be found on the project’s page:
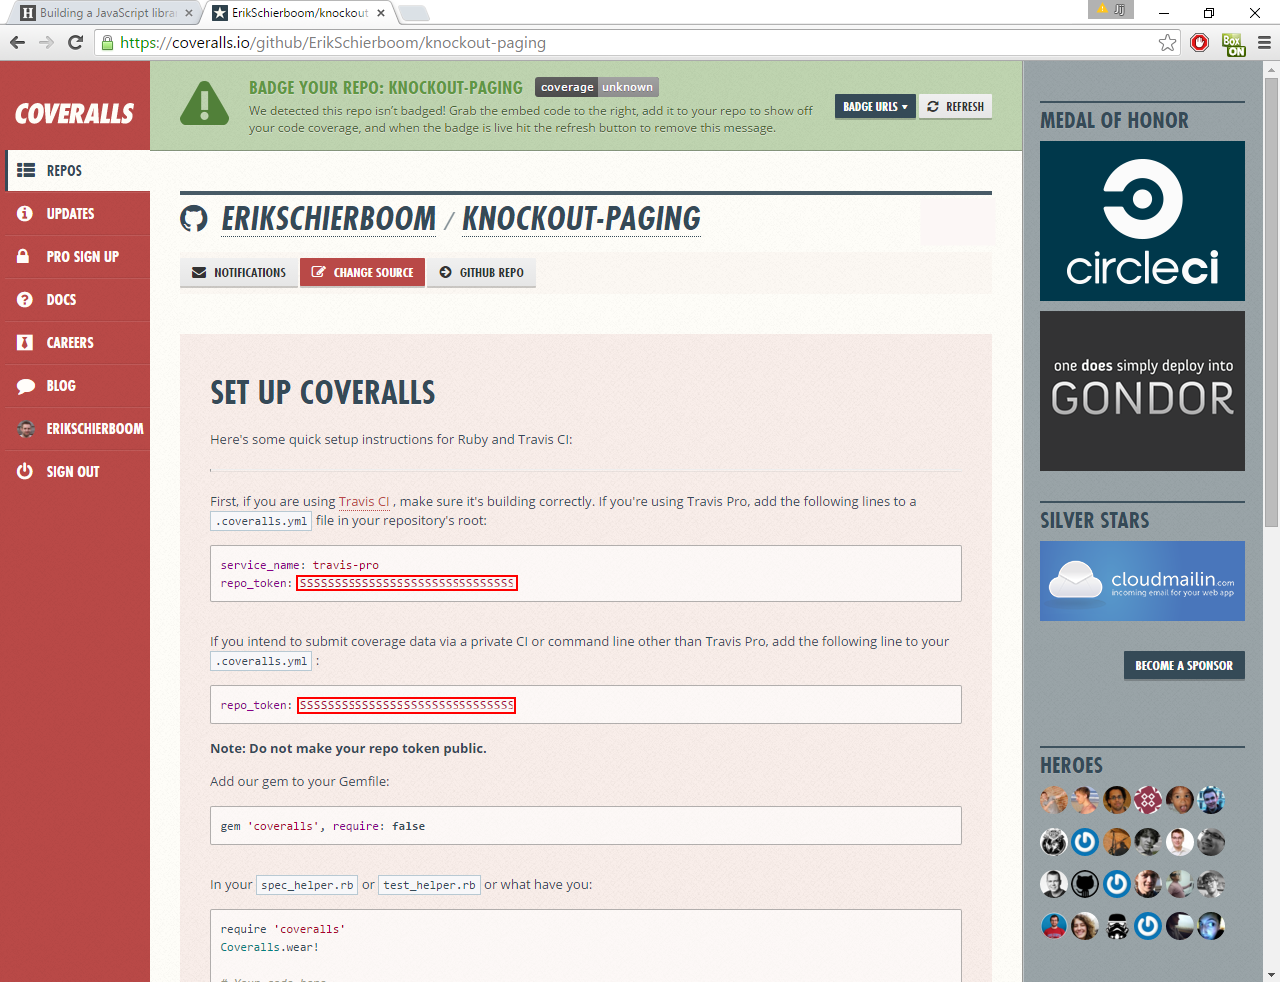
So how do provide the coveralls library with the correct repository token? There are actually two options:
- Create a
.coveralls.ymlfile that has arepo_tokenkey which value is the repository token. - Set a
COVERALLS_REPO_TOKENenvironment variable to the repository token.
You should only use the first option for private repositories, but as our library is open-source, we’ll use the second option.
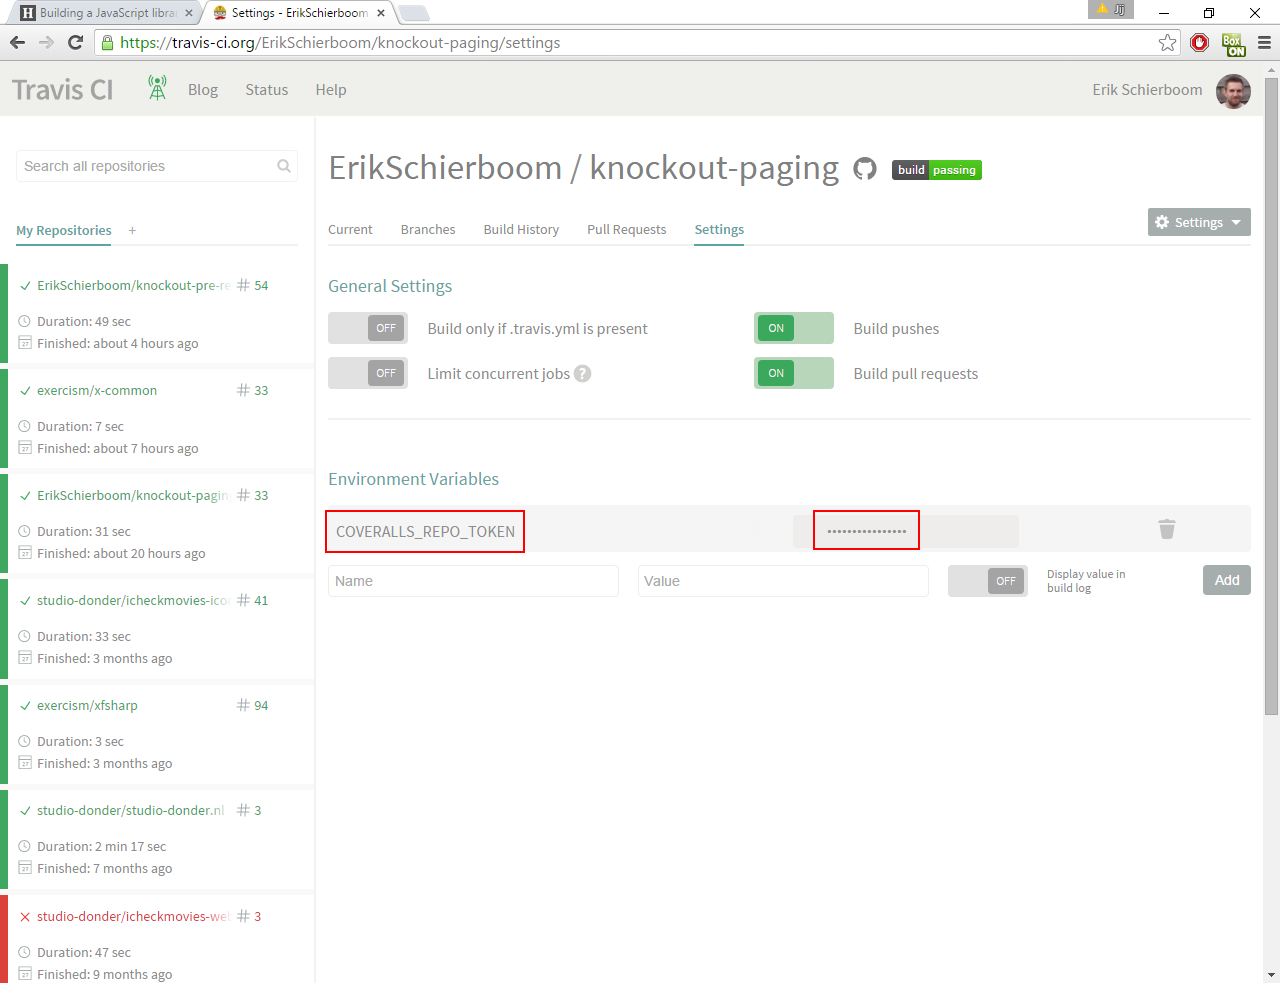
As we want to use Travis to automatically submit our coverage reports, we first go to our repository’s settings page on Travis. There, you’ll find a section named “Environment Variables”:
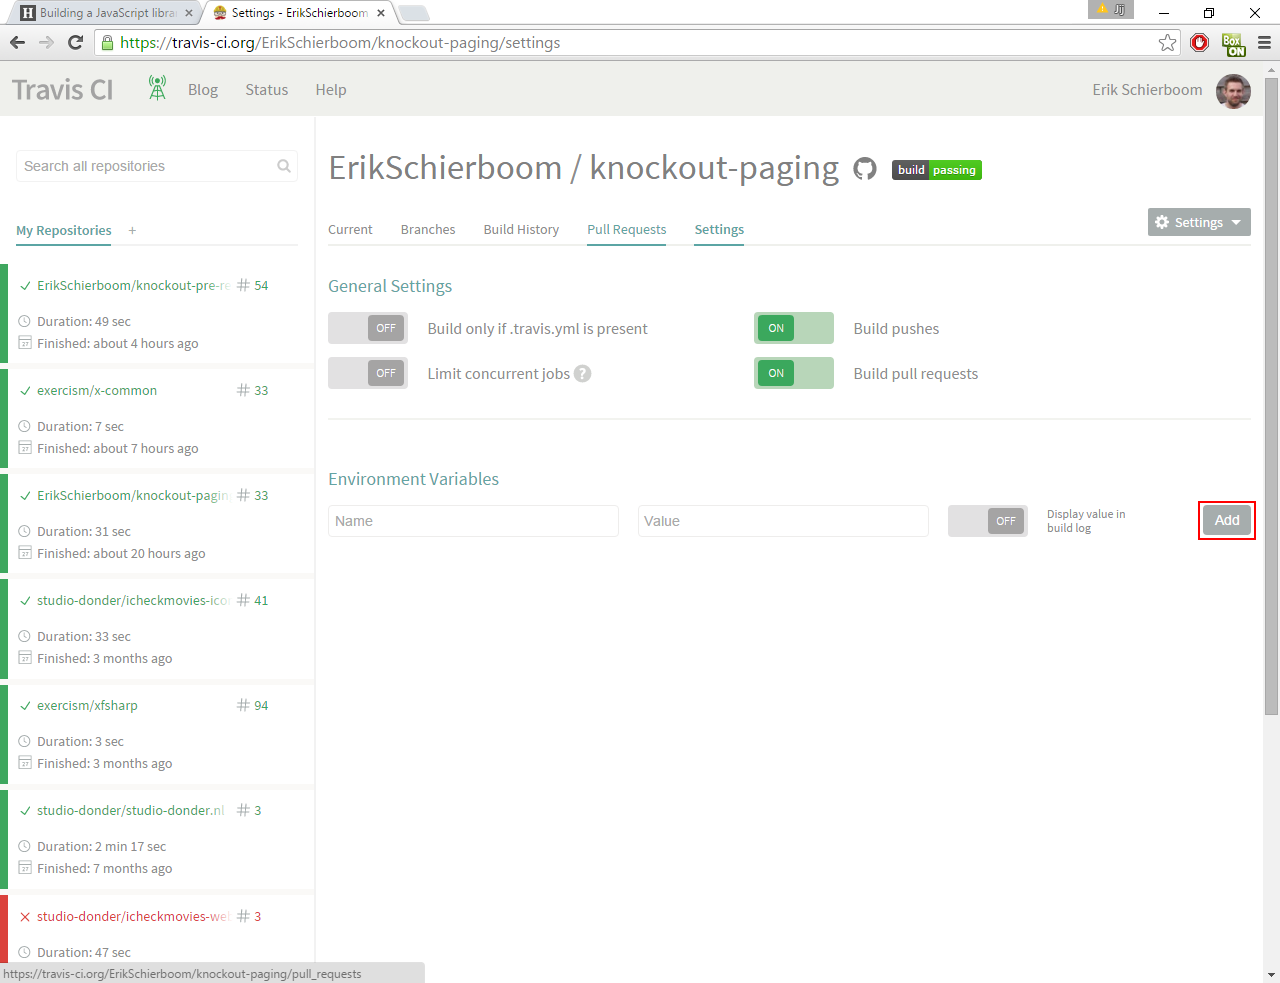
At the moment, there are no environment variables, so we’ll click on the “Add” button. This will show two input fields: one for the environment variable’s name and one for its value:
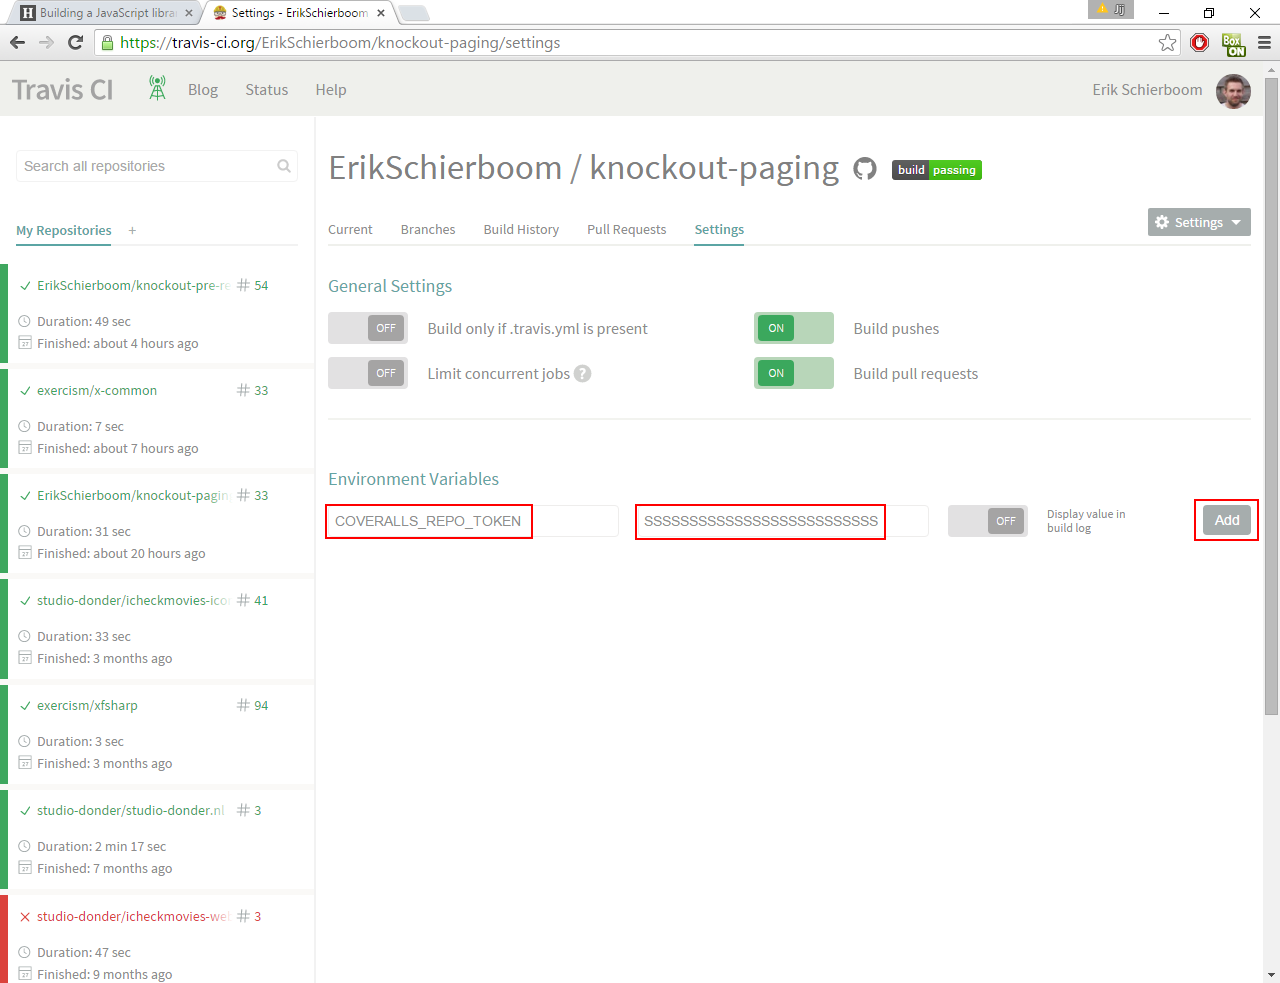
After we have entered the correct name and value, we click on the “Add” button to save the environment variable. From now on, any new builds will have its COVERALLS_REPO_TOKEN enviroment variable set to the value we specified.
Note that for security reasons, you won’t see the actual value on the settings page:
The final step is to modify our .travis.yml file to submit the coverage results to coveralls.io after each successful build. To do so, we add an after_success section which does the following things:
- Use Mocha to run our tests.
- Run Mocha using the
blanketlibrary to detect code coverage. - Use the
mocha-lcov-reporterreporter to output the code coverage results. - Pipe the code coverage results to the
coveralls.jsfile from thecoverallspackage. coveralls.jsconverts the coverage results to the coveralls.io format.coveralls.jssubmits the converted coverage results to coveralls.io.
These steps are all done in a single command, which we add to the .travis.yml file:
after_success:
  - NODE_ENV=test YOURPACKAGE_COVERAGE=1 ./node_modules/.bin/mocha --require blanket --reporter mocha-lcov-reporter | ./node_modules/coveralls/bin/coveralls.js
We then commit our modified .travis.yml file and push it to GitHub. This will cause Travis to do a new build of our repository, but this time it will also submit the coverage results to coveralls.io.
Once the build has completed, we can see the coverage results on our repository’s coveralls.io page:
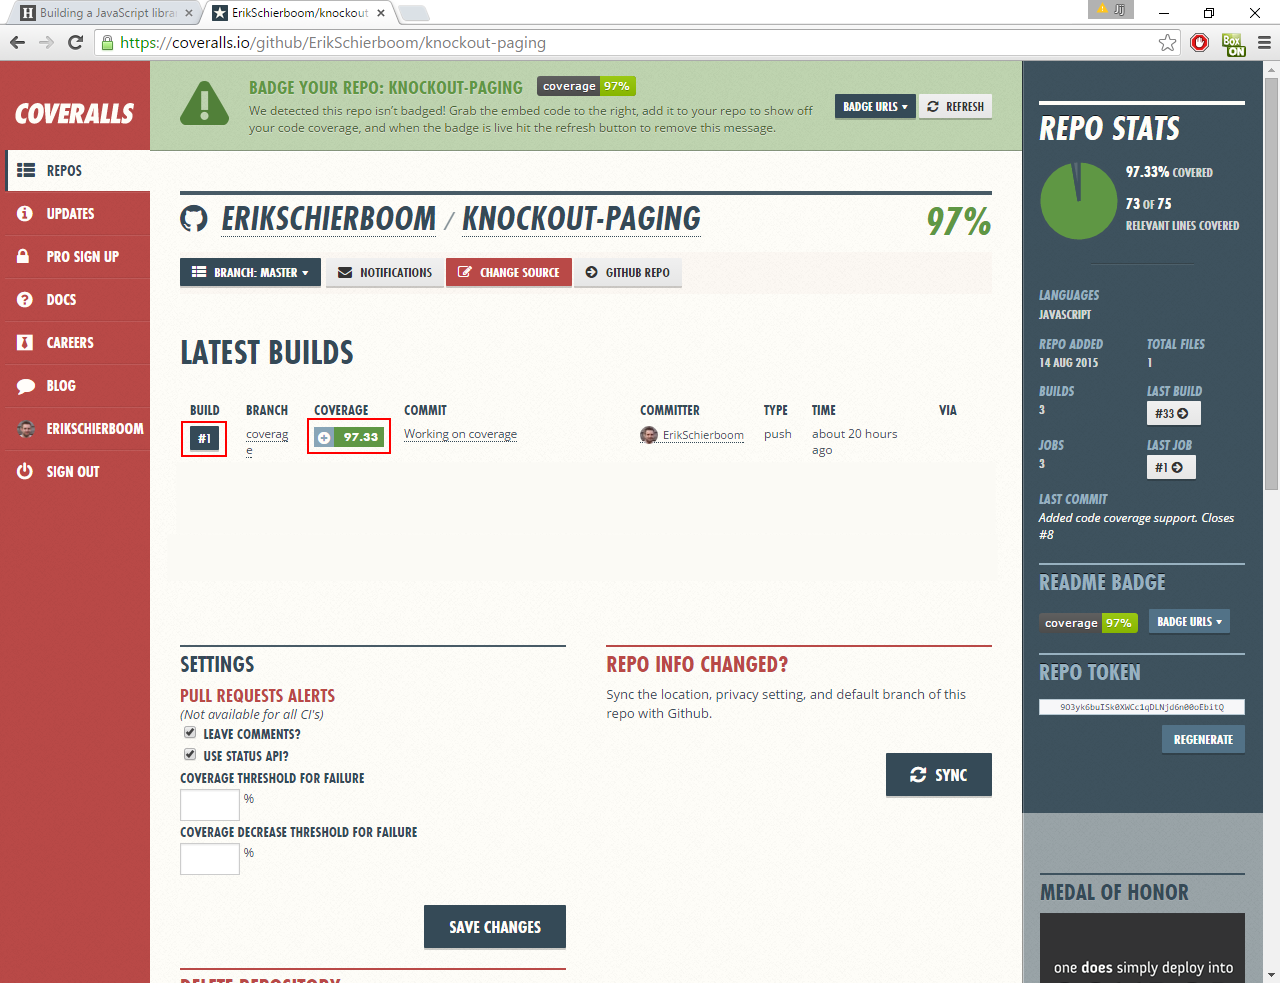
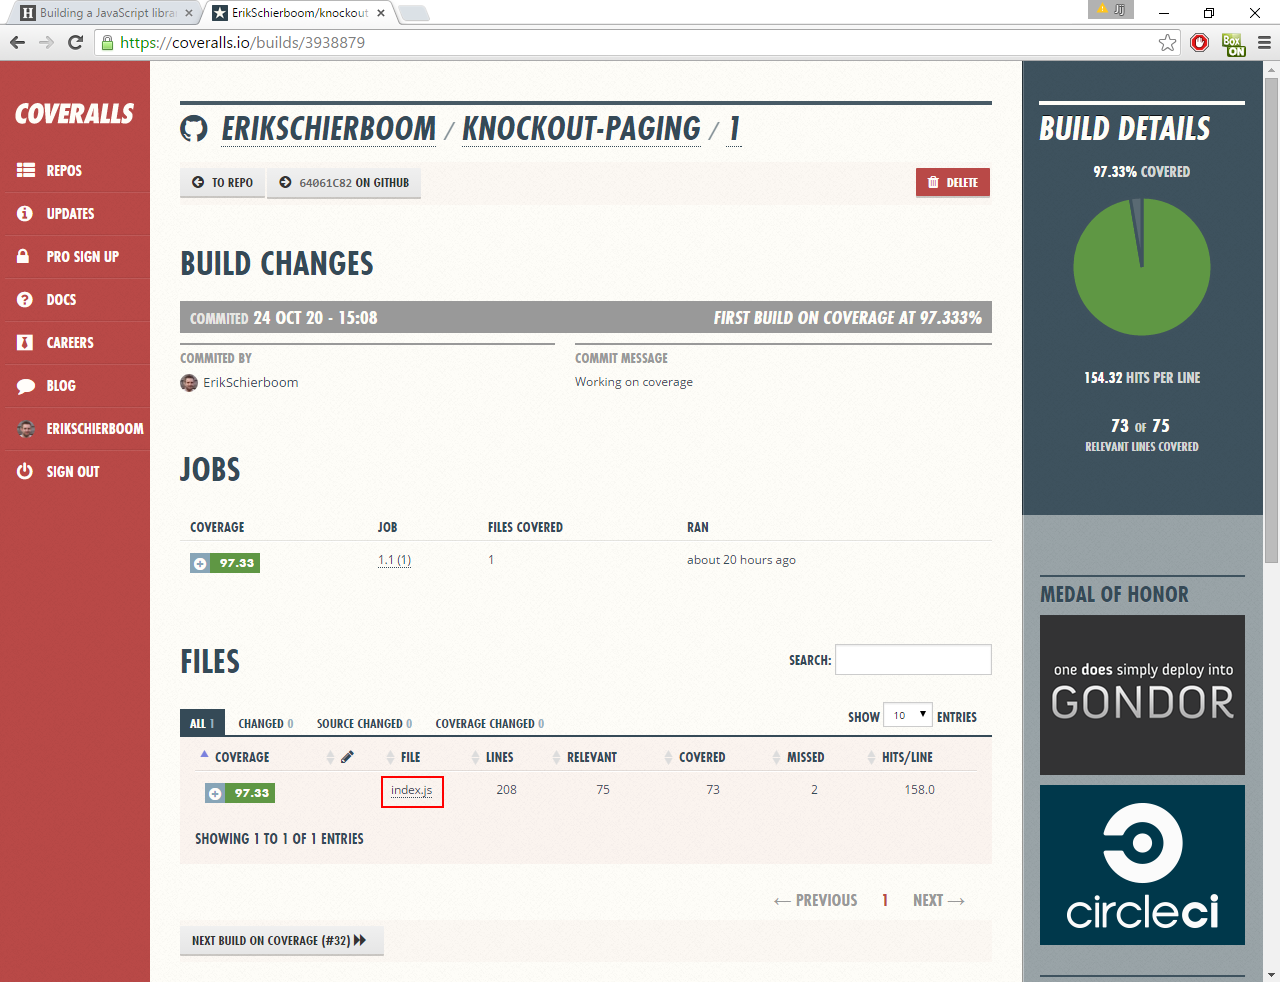
We can drill down on the coverage for an individual build by clicking on the build number. This will show the coverage details for that build:
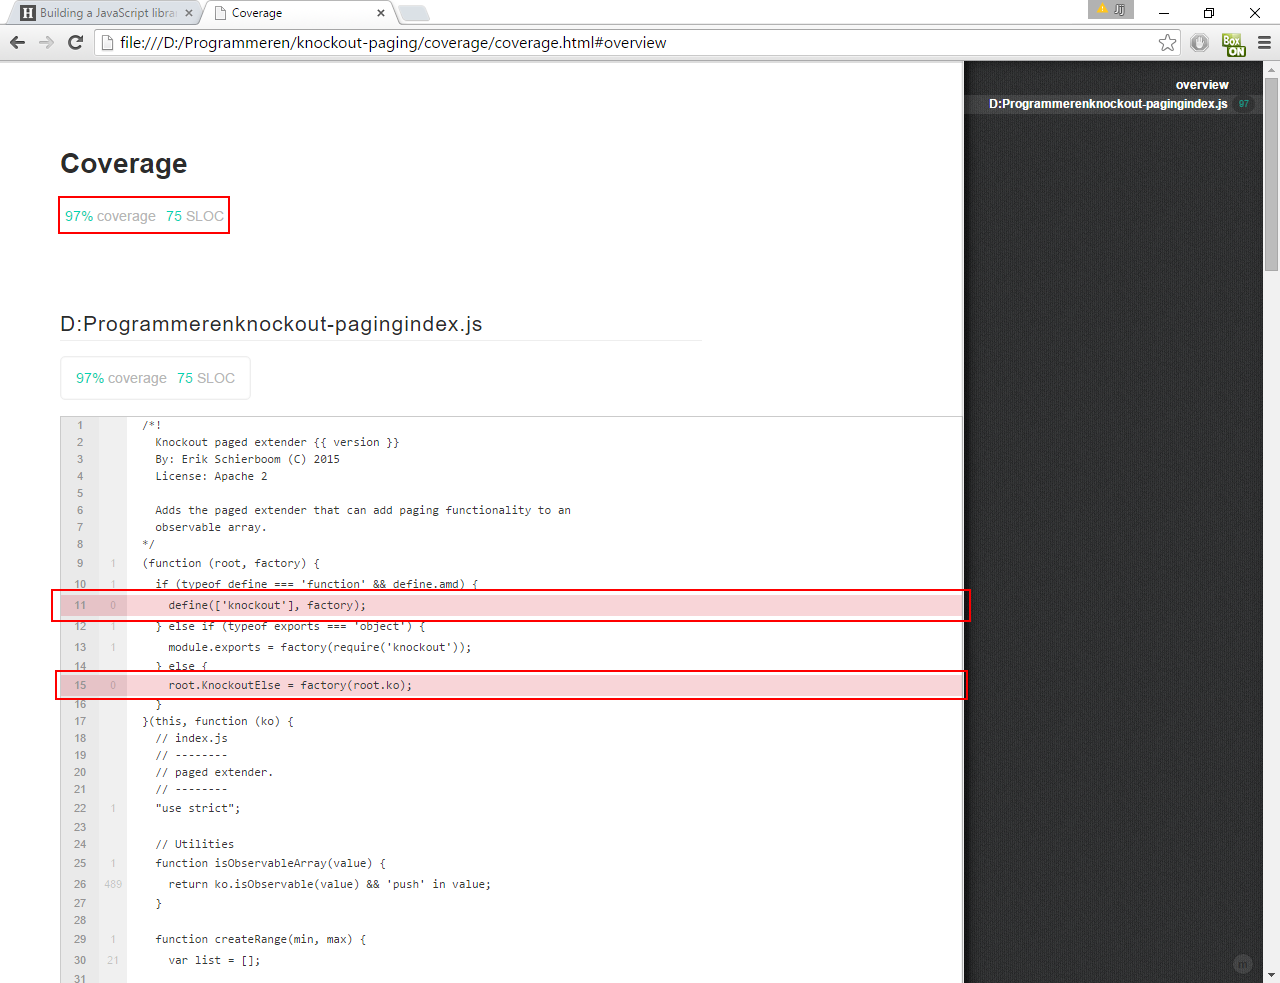
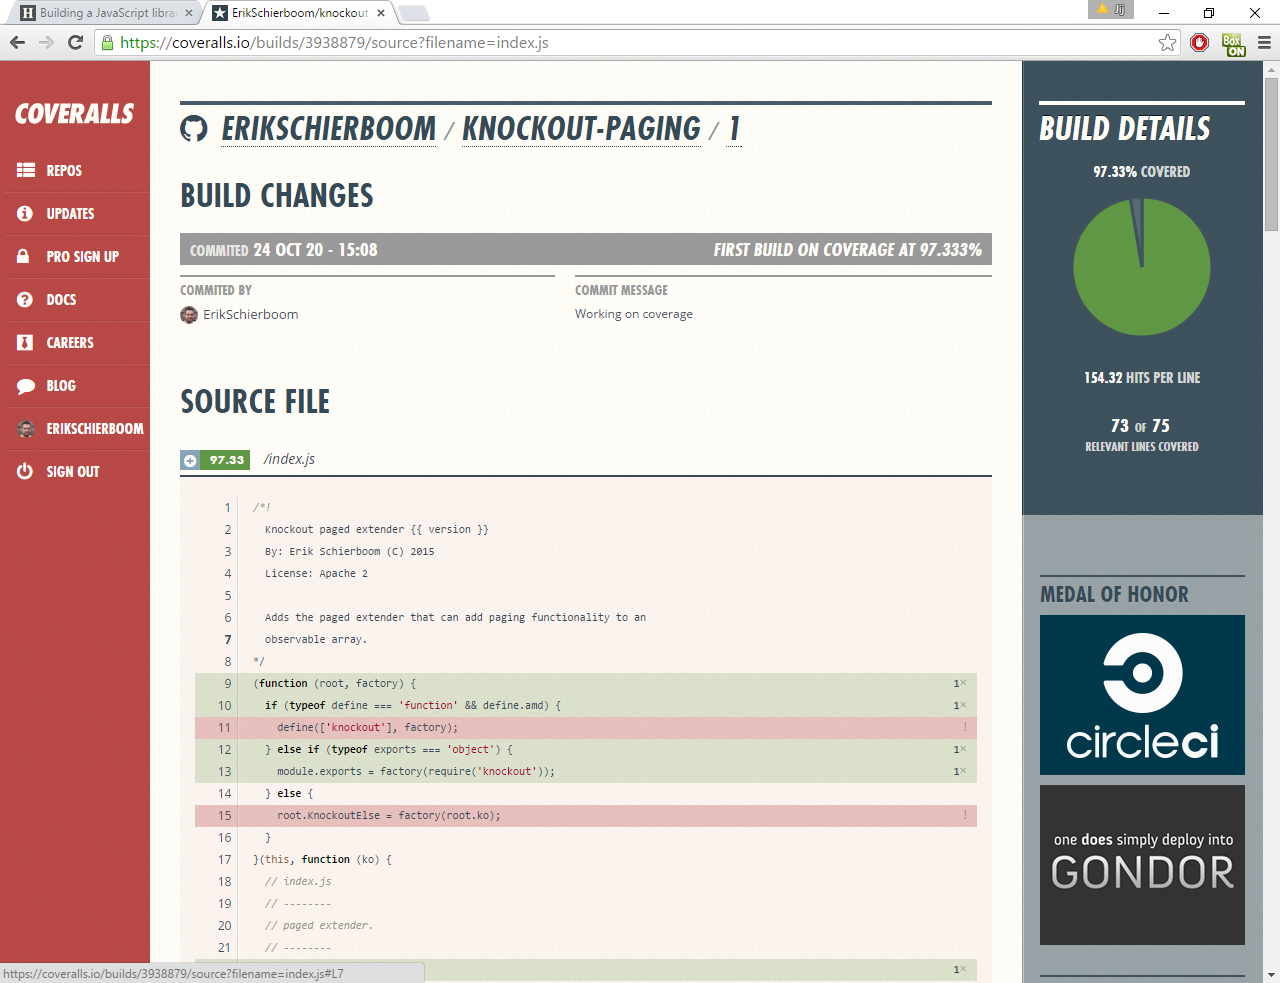
One very handy feature is that by clicking on one of the covered files, that file will be displayed and each covered line will have a green background, whereas each uncovered line will have a red background:
And now we have setup Travis to automatically calculate our library’s code coverage and submit it to coveralls.io.
Conclusion
For our library, we wanted to ensure maximum compatibility. To this end, we setup the Travis and AppVeyor build servers to automatically build and test our library whenever the repository is modified.
Both Travis and AppVeyor were easy to setup, requiring a small number of clicks to enable automatic builds for our repository as well as creating a configuration file specifying how builds should be run. Furthermore, as Travis runs on Linux and AppVeyor on Windows, we automatically test different platforms.
Setting up automatic code coverage reports was slightly more work, but also not that difficult using the free coveralls.io service.
In the next post we’ll add support for TypeScript.